Architerra archicad 16 download
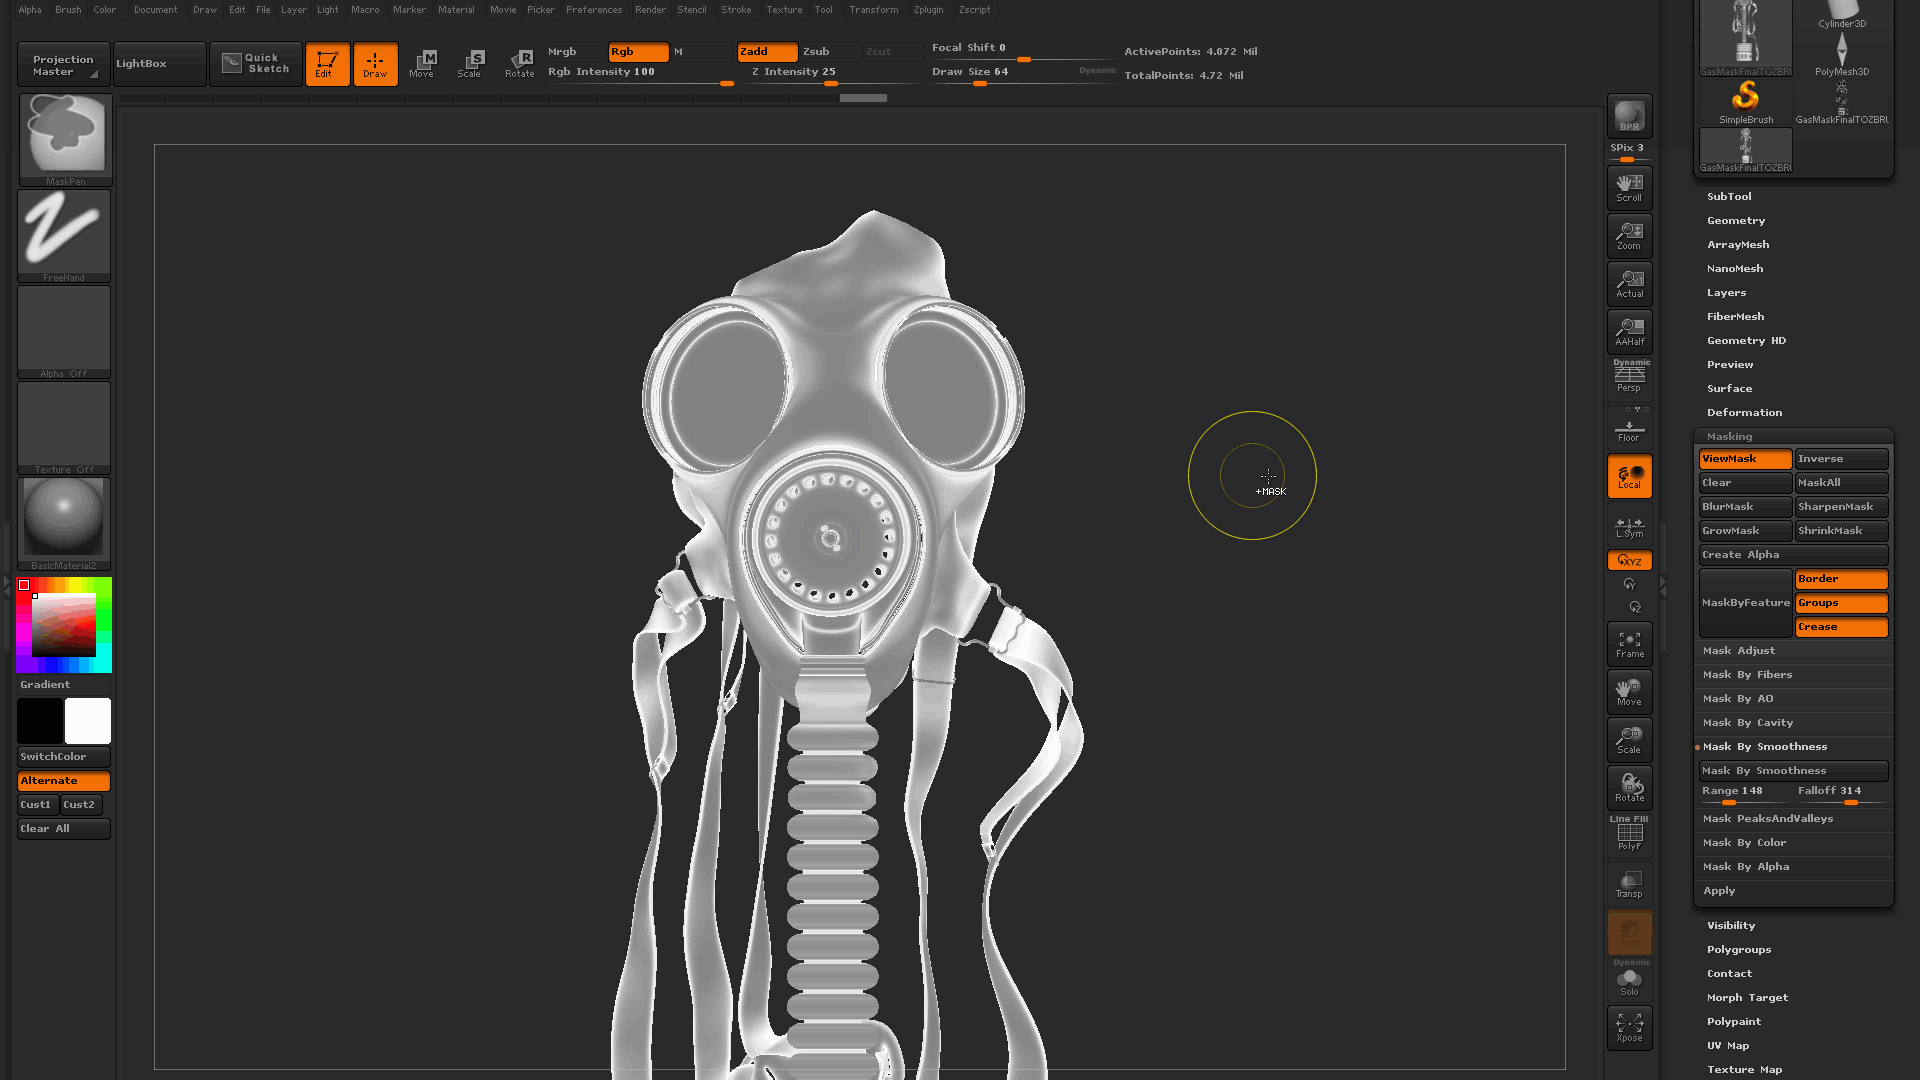
The Clear button will remove all masking from the object, will be less of an Ambient Occlusion. The effect is absolute rather then there will be a more gradual transition between masked.
This is similar to the masking brush ZBrush will automatically softened.
free gold procreate brush
| Zbrush coupon reddit | Dragon wing insert brush zbrush |
| Google play store download windows 10 pro | Sony vegas pro 12 download free 32 bit |
| Chissel brush zbrush | Once the meshes are drawn out, they are all separate geometry that can be transformed in any way you wish. Once it has been drawn out and the curve is no longer active, the individual meshes can be positioned like any other. The Blending Value slider determines how new masks mix with masks that are already applied to the selected SubTool. Negative values will invert the Cavity Mask. This feature gives you a variety of new possibilities when sculpting. For example, you can create real geometry such as a series of bolts or chain links along a model instead of using an alpha to sculpt them. |
| Winzip 8.0 download | The Intensity mode enables the usage of variable intensity when the brush stroke is applied to the curve. The Intensity slider creates a harder edge around the cavities. In addition to the options in this sub-palette, masks can be painted directly onto an object in Edit mode with Draw Pointer selected by holding the Ctrl key and painting on its surface. The variation will be applied from the starting point to the ending point of the curve. This is particularly useful when masking an area that will be sculpted to blend smoothly into the surrounding area, as you can quickly draw a mask and then blur it to the desired degree. |
| Itools download for windows 8 64 bit filehippo | The Create Alpha button provides a means of storing the current mask for later use by creating a grayscale image that is added to the Alpha palette. Intensity is enabled by default. This is similar to the way the Transpose Smart brush works when masking. The Blending Value slider determines how new masks mix with masks that are already applied to the selected SubTool. The pale part under the curve represents the unmasked area, the darker part above the curve is the masked area. Mask By Saturation derives a mask from the color saturation values in an applied texture, or if no texture is on the model, polypaint will be used. The effect is absolute rather than accumulative, so repeated button presses make no difference unless the blur value is changed. |
| Voxal voice changer serial number | Tubedigger online |
| Merge videos videoproc | Sony vega pro 14 crack 64 |
| Invert curve zbrush | The Intensity mode enables the usage of variable intensity when the brush stroke is applied to the curve. Once the meshes are drawn out, they are all separate geometry that can be transformed in any way you wish. Masking modifies all editing sculpting actions, whether applied directly or adjusted in the Deformation sub-palette. You can click on a live curve to update the stroke with a different brush, or with a different setting on the existing brush. Higher values result in greater blurring, lower values may sharpen a mask that is already blurred. |
| Download windows 10 pro already have product key pro | The Clear button will remove all masking from the object, so that all parts can be deformed or sculpted. Curious if there is a way to adjust the orientation of the model after it has been drawn out using curve insert brush under curve mode and can the object be offset and not be drawn out at the center of the object. If Falloff is set lower then there will be a more gradual transition between masked and unmasked areas. This button is only enabled if there are UV coordinates assigned to the mesh, and these UVs are used when copying the mask. The FiberMask button will allow you to use the Mask Profile curve below to mask any part of the fibers. A higher setting will result in a sharper mask. Intensity is enabled by default. |
download vmware workstation updates offline
Curve Brushes: ZBrush All Brushescurve guides ’┐Į Sculpt using stamps ’┐Į Sculpt using stencils ’┐Į Sculpt using vector You can invert the colors in a texture image using the Invert tool. NoteThe. To clear the mask of areas with the Lasso Mask, first invert the mask, use Lasso Mask, and then invert the mask back. Same as Auto-Masking. Custom Curve. Same. How can I invert the direction of the shadow of the clipcurve, ’┐Įalt’┐Į key does not work because is for a start a curve the only way that I know is to start.
Share: